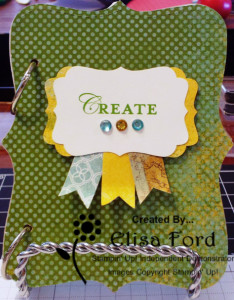
This adorable Epic Day mini brag book comes together quickly and can be used for so many purposes. Keep it for yourself or give it to a friend! I plan to use mine to jot down craft ideas and sketches.
SUPPLIES:
Stamps: Loving Thoughts (128436 W, 125845 CM)
Ink: Gumball Green Classic Stampin’ Pad (126861)
Paper: Whisper White Card Stock (100730), Epic Day This and That Designer Series Paper (130814)
Tools & Accessories: Big Shot Die-Cutting Machine (113439), Top Note Bigz Die (113463), Rhinestone Basic Jewels (119246), Decorative Label Punch (120907), Multipurpose Liquid Glue (110755), SNAIL Adhesive (104332), Stampin’ Dimensionals (104430), yellow & turquoise permanent markers, binder rings, chipboard, hole punch or binding system
INSTRUCTIONS:
- Using the Top Note Die and the Big Shot:
- Cut a front and back cover for the brag book out of chipboard
- Cut a designer series paper (DSP) cover for the front and back
- Cut the inside pages with Whisper White card stock (as many as you’d like!)
- Adhere the DSP to the front and back cover of the brag book chipboard using liquid glue
- Stamp the sentiment of your choice with Gumball Green ink onto Whisper White card stock and punch out with the Decorative Label punch.
- Punch a piece of DSP with the decorative Label punch and cut in half. Adhere each half to the back of the stamped white piece as shown in the photo.
- Cut three 1/2” DSP strips and cut the ends to look like banners. Adhere them to the back of the sentiment piece using SNAIL.
- Adhere the entire sentiment piece to the front of the mini brag book using dimensionals.
- Color rhinestones using permanent markers and adhere to the front of your sentiment piece as shown.
- Cut two binding holes through the front & back cover, as well as the inside pages, using a sturdy hole punch and hold together with binder rings — or bind the book with your favorite binding system.
Leave me a comment and let me know what you think. What would you use your mini brag book for?


