Four Steps to a Finished Scrapbook

I am really excited to announce that I recently finished my son’s first-year scrapbook! (He’s four!) Those of us who truly enjoy our scrapbooking hobby know that “finishing” an album is a rare thing. Many times we might have several scrapbooks “in progress” and sometimes we just don’t feel like working on a specific scrapbook, so it’s fun to be able to switch around between multiple projects. I really had to decide that finishing his “baby” book was a priority — and I am so happy that I did!

I wanted to share a few steps that really helped me get it done, without feeling like I was forgetting something!

  1. First, everything starts with your photos. Mine were primarily on my computer to begin with, so I went through ALL of them from his first year (and some from before he was born) and made a list of what I had to work with, in chronological order. Some photos fit neatly into an event or theme, and some were just daily life. I listed it ALL. It helped me to keep this list on my Google Drive, but a handwritten document could work for you.
  2. Second, I had my photos printed. ALL of them from his first year, whether I thought they might be included in the scrapbook or not. This way I would still have all of them either sorted in labeled boxes or in his scrapbook. It gave me some flexibility towards the end of my project when I decided to include a 12-month retrospective (2-page spread) using one photo from each month that I hadn’t previously used in the book.
  3. Third, I pulled ALL the designer papers (patterned scrapbooking papers) that I might use for his scrapbook into ONE container. This made it more simple for me to go to ONLY that one spot to find paper for each layout, rather than digging through my entire stash of paper each time. Also, you may decide to tie all your scrapbook album pages to a certain design or theme — so keeping all of that together makes more sense. I didn’t include solid card stock in this project stash, because with my craft room layout it is easy enough to pull pages as I needed them. You could also include embellishments in this step, but I tended to make or use embellishments as I went, so I didn’t need to collect them all at once.
  4. Finally, I simply got started making pages. With my handy list of photos, organized by month, then by event, I could make a page and cross it off my list. I didn’t have to necessarily scrapbook each page in order, so jumping around within the album made me feel a little more inclined to scrapbook because I didn’t HAVE to work on a specific page. For example, one of the first layouts I completed was Liam’s first birthday! Some of the last pages I completed were from right before he was born!

So, I hope reading a little about my process might help you get your scrapbooking done, or at least help you get a little more organized. Everyone has to do what works for them, and this truly helped me get my son’s first-year scrapbook completed before he left for college! Now I am working on a scrapbook from my high school days (almost 25 years ago!) and I’m more motivated to get it done, now that I know that it’s possible to finish a scrapbook!

I’d love to hear the steps that work for YOU when scrapbooking. Share them in the comments below! And please contact me if you have any questions!

~Elisa

“Best of Butterflies” Stamp Set from Stampin’ Up!

Welcome to the “Best of Stampin’ Up!” stamp set for April… The “Best of Butterflies!”

Each month I’ll post information here on my website about the NEW “Best Of” set for that month:

The Details:

  • All “Best Of” stamp sets will include 3-5 images, including a never-before seen image, and will be priced at $14.95.
  • While just one “Best Of” stamp set will be released each month (with a new theme each month), all of the “Best Of” sets will be available until March 31, 2014.
  • All “Best Of” stamp sets are available in Clear-Mount only.
  • As a special incentive to collect the “Best Of” stamps, starting in February there will be a collector’s card and 25-year proof of purchase sticker included with every “Best Of” set. Collect six stickers, and send it in to redeem a FREE set of your choice valued up to $14.95! Free sets must be redeemed no later than April 30, 2014.

DOWNLOAD the Collector’s Card HERE!

Contact me for more information or visit my page every month to see what’s NEW!

Happy Stamping with the NEW “Best of Butterflies” Stamp Set from Stampin’ Up!

Free Shipping This Weekend, from Stampin’ Up!

That’s right, Stampin’ Up! is offering FREE SHIPPING on orders of any size and any type, this weekend only!  Apparently this is something they have never done before, so I hope you’ll take advantage of this deal!

Dates: April 6 beginning at midnight —> April 8 ending at 11:45 PM

Order Types: Customer order through demonstrator, Customer order online, Workshop orders, Clearance rack orders, Demonstrator orders

2 Ways to Order

1. Visit my online store and place your order yourself. Spend as little or as much as you wish… shipping is free!  Orders of $150 or more qualify for hostess freebies.  You should choose the online option if you plan to order Clearance Rack or include Digital downloads on your order, although digital downloads never have shipping costs.

2. Email or call me to place an order, and I will enter it for you.  Again, your order can be any size! If you choose this option, please contact me no later than noon on April 8, so I have plenty of time to submit your order for you! Emails should include item numbers and descriptions.

Fine Print: Free Shipping will not be available if you choose to “expedite” your order.

Let me know if you have any questions! I’m here to help you get the most for your money, with Free Shipping from Stampin’ Up!

[NEW] This & That from Stampin’ Up!

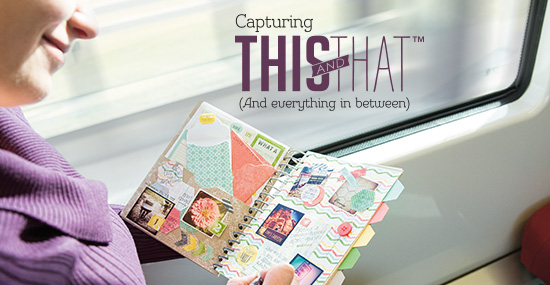
This & That, a new product offering from Stampin’ Up! is here! It’s a “make it your own” journal notebook, that you can customize to your needs and decorate in any way you’d like!

This & That from Stampin' Up!

This & That Informational Flyer from Stampin’ Up! (PDF)

I just got my This & That (and I got the whole kit bundled together & saved 15%! – bundle only available through April 30, 2013) and got to thinking about ALL of the different ways to use this fun notebook:

diary/journal, dream journal, engagement/wedding/baby journal, vacation journal, vacation planning, quotes & inspirational items, favorite Bible verses or verses you are memorizing, daily random stuff, pinterest ideas, goal setting, fitness journal, gratitude journal, pregnancy journal, year keepsakes/memories, gift for friends or family, sewing ideas/journal, home projects, work projects, big book of grievances, mini album for you or a gift, college visits, new college student journal, clubs & organizations (ideas & keepsakes), card or scrapbook layout ideas (sketches), to do lists (daily or specific projects), calendar, recipes, meal planning, shopping lists.

PHEW!

Well, those are MY ideas, and I am still not sure just what I will use my own This & That notebook for…

What would YOU use it for?

What ideas did I leave off my list?

Let me know in the comments!

To order your This & That, visit my online store. And as always, let me know if you have any questions!