My New Favorite Designer Series Paper!

As I hope you already know, Stampin' Up!'s Sale-A-Bration is in full swing! This year the free exclusive items are just fantastic.  My most favorite is the Everyday Enchantment designer series paper (125154).  This paper is gorgeous, and I find myself using it for everything lately!

EE-DSP-SAB2012
To get your own package of this 12×12, double-sided paper, place a $50 order with me before March 31, 2012.  For every $50 you spend, you can select any of the items in the Sale-A-Bration brochure for free!  Some items are exclusive to SAB, and some are found in our Idea Book & Catalog, but they are all fantastic.

Visit my YouTube channel to see a project I made using the Everyday Enchantment designer series paper – a cute little door hanger for my sister Elaina!

MICBlogHeader5.11-elisa sig

Playing With Chipboard & My Big Shot

I'm back from my mini-hiatus and ready to show you some really cute projects that my sister and I created over her spring break!

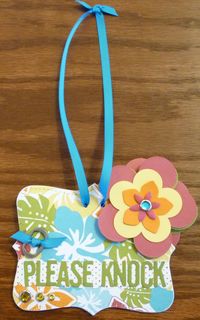
Up first, is my On Board chipboard (114320) project, using the Big Shot  die-cutting machine (113439).  I recently ordered some sheets of the On Board chipboard specifically to try it out on my Big Shot.  I think my project turned out very cute, even though some of the items I used are "retired" items.  I think it is very fitting for spring & spring break!
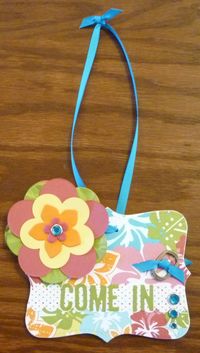
Tropical door hanger-front Tropical door hanger-back
     
I love the Top Note Die (113463) so much – it's very versatile!  It's beautiful on scrapbook pages & cards, and I've used it to make lovely 3D projects like boxes, bag toppers, and table placecards.  If someone made me choose only one die, then this would be it!

The On Board chipboard pages come in a package of 6, 13-3/4"x5-3/4" sheets, already sized to run through the Big Shot.

Some of the other items I used for this project: Circle Ice Rhinestone Brads (109111), Circle Fire Rhinestone Brads (109110), Billboard Sizzlits Decorative Strip Die (114510), Rose Red, Pumpkin Pie, So Saffron & Old Olive Card Stock. The rest of the items I used are "retired" so if you need to know what they are, just email me or message me in the comments.  Funny story… I had to add the metal pieces on each side of the project because of the big flowers at the top.  It was tipping to the side and the metal balances it so it hangs straight.  It gave me a cute place to tie a ribbon knot, anyway!

I hope you enjoyed this project.  Watch for more very soon.  We created a LOT of cute projects!

Happy Crafting!

~Elisa
Sweetheart… Sweet & Simple Valentine Flowers!

Love is in the air! Valentine's Day is Monday, February 14th, so I wanted to share this very simple, very sweet Valentine idea.

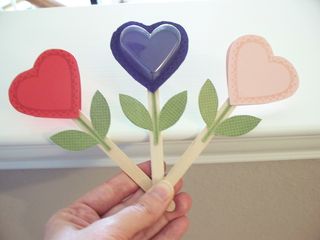
Sweetheart Flower Valentines
Using the stamp set Sweetheart (120780 C) I made these flowers on a stick!  Simply stamp the heart shape in ink that matches your cardstock, or with VersaMark (102283). For this project I used current "In Colors" Poppy Parade, Concord Crush, and Blushing Bride. Coordinating your ink or using VM will give you the tone-on-tone look in the picture.  Using my Paper Snips (103579) I cut around the outside of the heart shapes. Before cutting around the outside of my Concord Crush heart, I used my Full Heart Punch (119883) in the middle and inserted a Heart Treat Cup (120435). Then I stamped my leaves on the Pear Pizzazz card stock with Pear Pizzazz ink (or VersaMark) and cut them out. The sticks are regular popscicle sticks from a craft store.  I adhered the leaves to the sticks using Crystal Effects (101055) and the hearts are attached to the top using Stampin' Dimensionals (104430).

This project was easy and fun!  These flowers would be SO cute arranged in a small flower pot!

I would love to hear what crafty fun you are planning for Valentine's Day – share with me in the comments!

My Decor Elements Project!

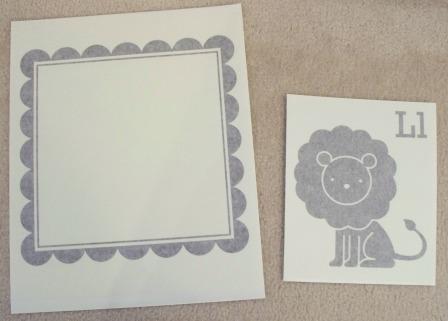
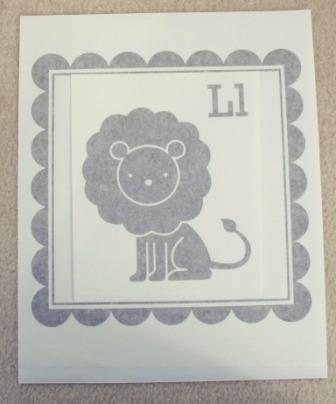
I've had this adorable Decor Elements lion and matching frame for a LONG time, and I'm finally starting my project!  This will eventually go into my 2-year-old son's room. The first picture is what the pieces look like just out of the wrapping. Then I have a photo of how I plan to use them together.

decor elements lion and frame
 decor elements lion and frame

The frame is approximately 11"x11" and the lion is approximately 7-1/2"x9". It's hard to tell since they are still in the packaging, but they are both Chocolate Chip (brown) in color.

Decor Elements are designed to go directly on your wall (or other smooth object) but I want to be able to move it around – so I plan to mount it on paper and then frame it or mat it.  See, I haven't ironed out all the details yet!

So watch this space for updates on this project!

Happy Crafting!

~Elisa